
Plaid Photo Mattes
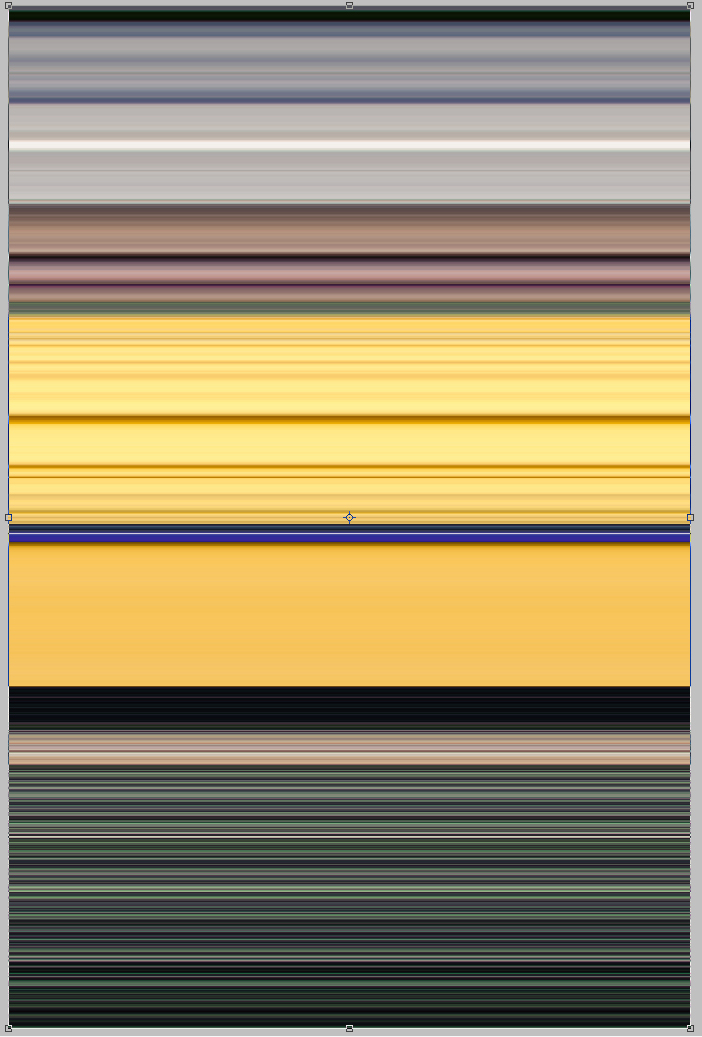
Ever wanted to matte your pictures, but couldn’t find the right color matte? Here’s a quick Photoshop tutorial to help you turn this:

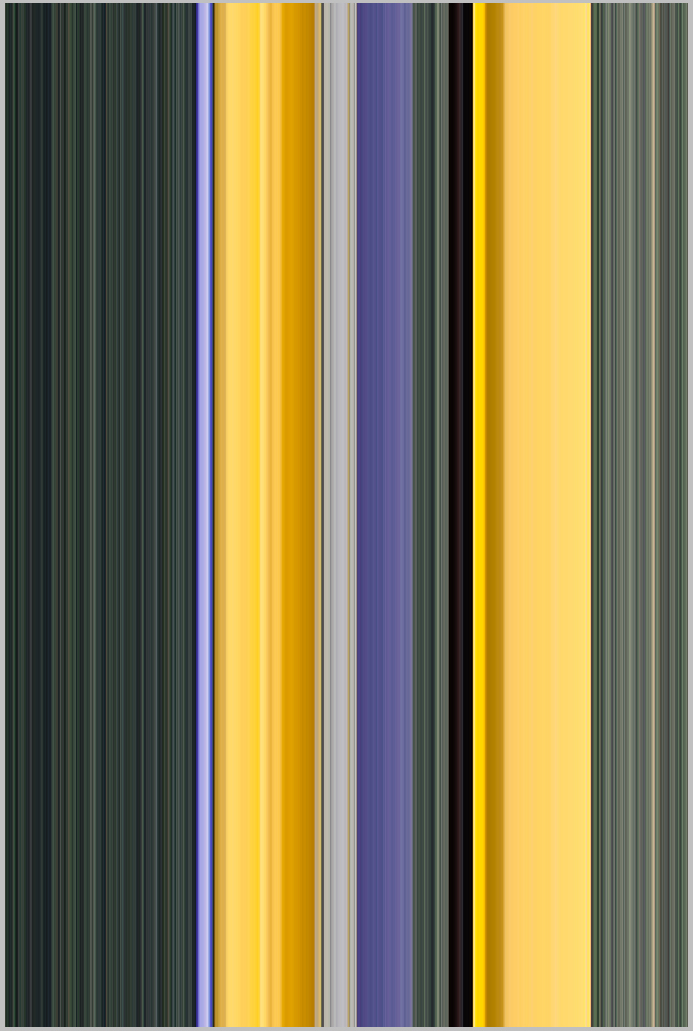
into this:

in just a few easy steps.
This tutorial is for Photoshop specifically, but can be done in most modern graphic software programs, as long it allows for layers.
- Open your photo in Photoshop, and open your layers palette by clicking Window > Layers or hit F7.
- Click Layer > New > Layer from Background.
- Select the single row marquee tool and select a single row (a selection 1 pixel high x the width of your picture) from your picture. Choose a row that has a varied selection of colors for a more colorful plaid, or for a more monochromatic look, choose one that has muted colors.
- Click Ctrl-J to create a new layer with your selection on it.
- Select your bottom layer (the picture) again.
- Select the single column marquee tool and select a single column with the same things in mind as step 3.
- Click Ctrl-J to create a new layer again.
- Select your new layer and click Ctrl-T or Edit > Transform > Scale
- Drag it to be the full width of your picture.
- Select your other “1 pixel layer” and do the same, only this time drag it to the full height instead of width.
- Change your top layer to 50% opacity.
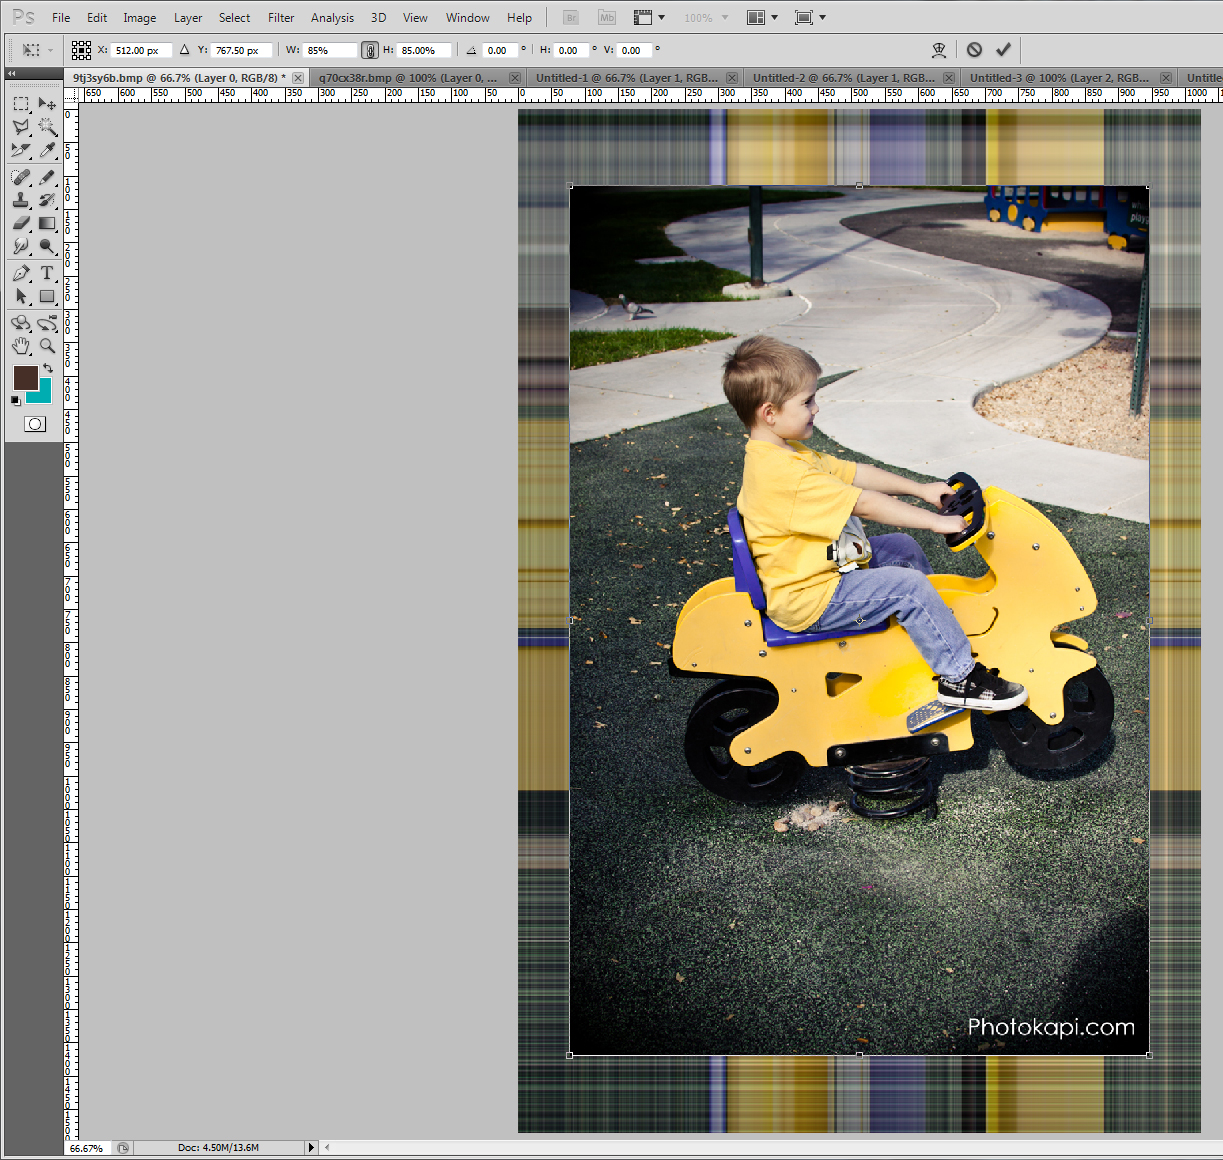
- Drag your bottom layer (the original picture) to be the new top layer.
- With that layer selected, click Ctrl-T or Edit > Transform > Scale and scale it to approximately 85%.
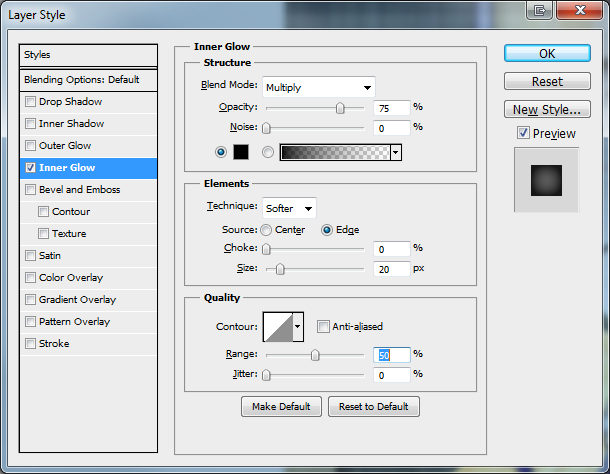
- Choose Layer > Layer Style > Inner Glow, then make the settings match below.
- You are done! Now chose File > Save and save the layered file if you want to be able to edit it later. Then File Save As and save a JPG that you can print out at your local photo lab or online.

There are literally tons of possibilities — you can even do black and white!


Let us know in the comments section what you think of the tutorial, and if there is anything that isn’t quite clear in the instructions.
Share this:


